Skip to main content
Pentanet Prism / Mercku M2 Mobile Configuration Guide
-
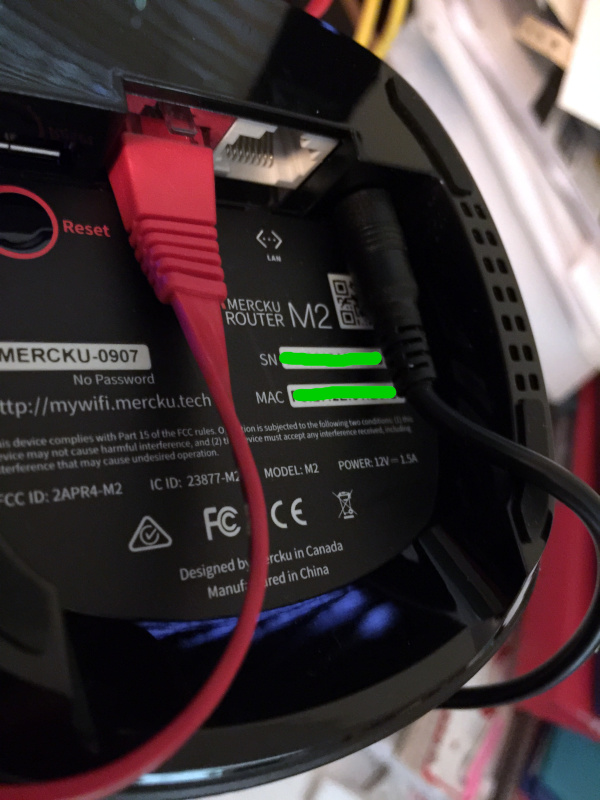
Firstly, please confirm your Pentanet Prism / Mercku M2 is plugged in and turned on via its provided power supply. Plug-in the provided networking cable into the red 'WAN' port (making sure it's also plugged in correctly into the related network connection device/wall socket)
Please hold down the 'reset' button until the light on the front begins flashing in a loop from red to green.
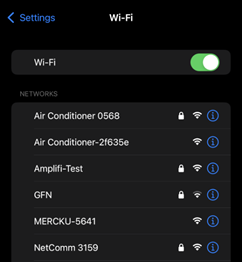
- Once the device reboots, visit the Wi-Fi network settings on your device and connect to the Mercku. The network will be displayed as "Mercku-XXX" and have no password.
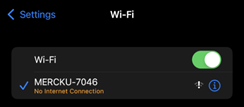
- Once the device has connected, this will likely say "No Internet Connection". This is normal.
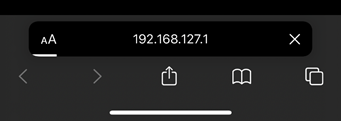
- Open an internet browser such as safari or chrome on your device, then type 192.168.127.1 into the address bar and click go/enter.
-
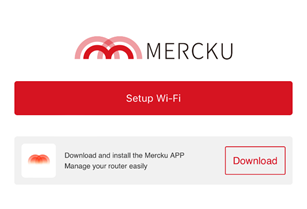
Once the webpage opens, Click "Setup Wi-Fi."
- Next, you set your personal Wi-Fi network name and password. The network name is the Wi-Fi network broadcasted from your router and displayed on any of your devices.
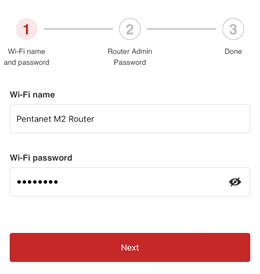
- Click next, then set your router admin password. The admin password can be assigned the same as your Wi-Fi password by enabling the checkbox. Then click save.

- A countdown will display on the screen. Once the countdown reaches 0, please go back to your device's network settings and connect to the Wi-Fi network you just created in step 6.
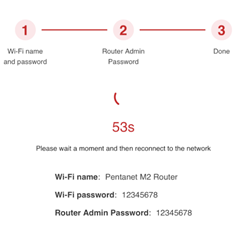
- Connect to your new Wi-Fi network, enter your password, then open your browser again.

- When you open your browser, enter your Router Admin Password (The same as your Wi-Fi password if enabled in step 7.
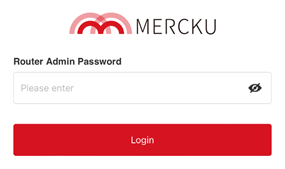
- Once you click Login, you will see the M2 dashboard. Click the "x" between your router name and the internet, as shown below.
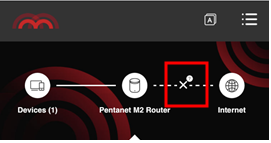
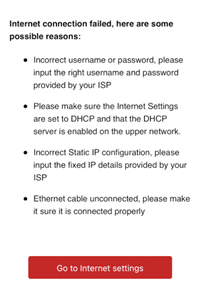
- Click "Go to internet settings".
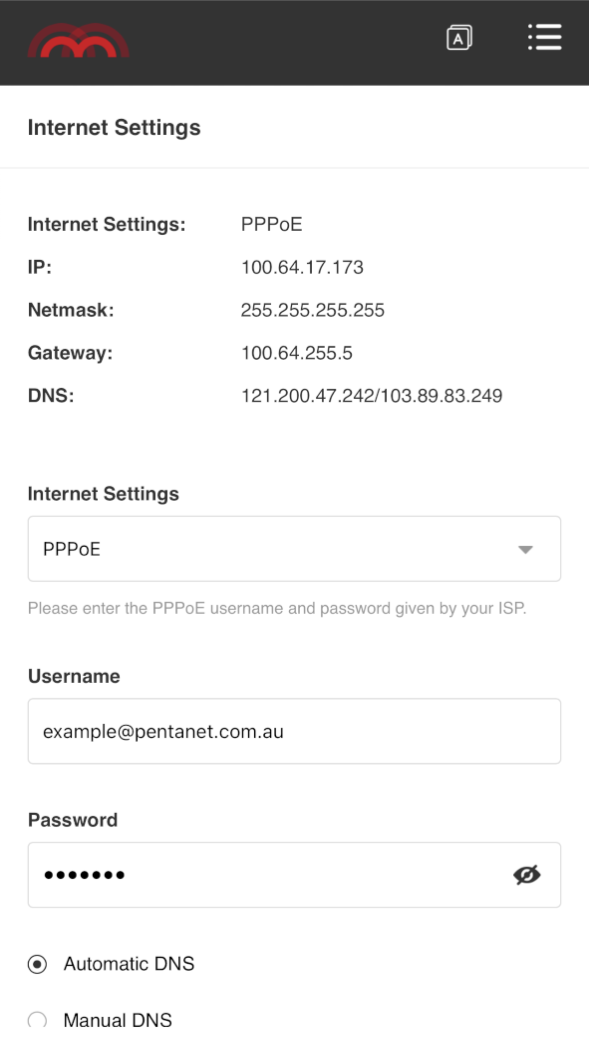
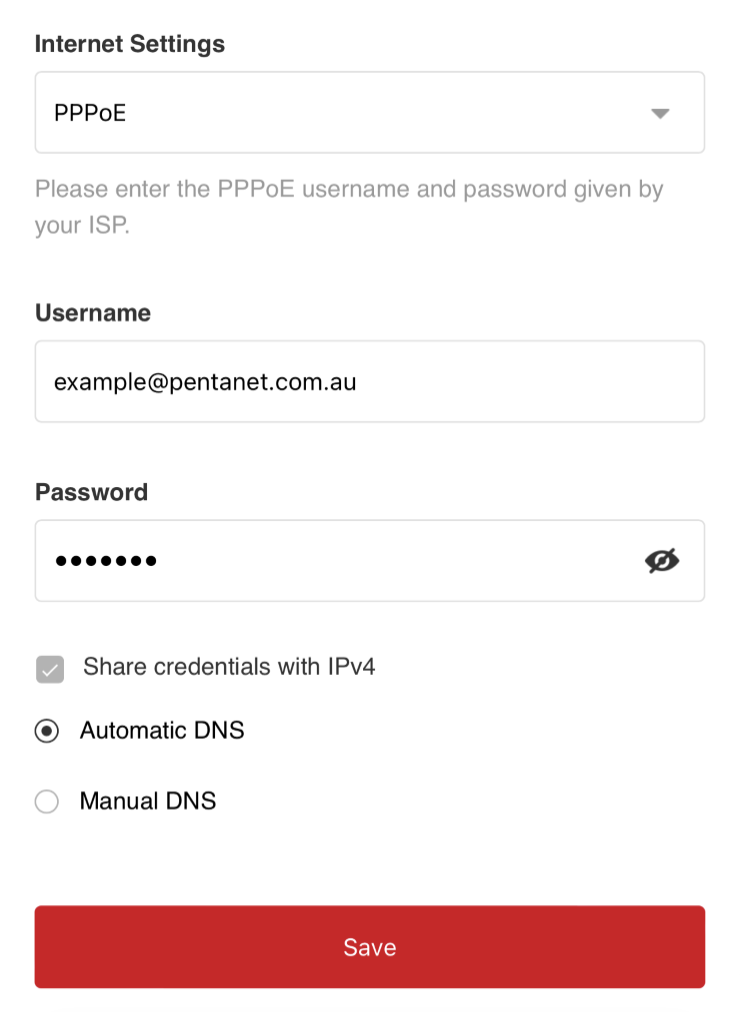
- Set "Internet Settings" to PPPoE. Then, enter your PPPOE username and password (provided in your Pentanet welcome email). Make sure DNS is set to Automatic and click Save.
-
Once saved, click the menu icon again in the top right, then under settings, select "IPv6".
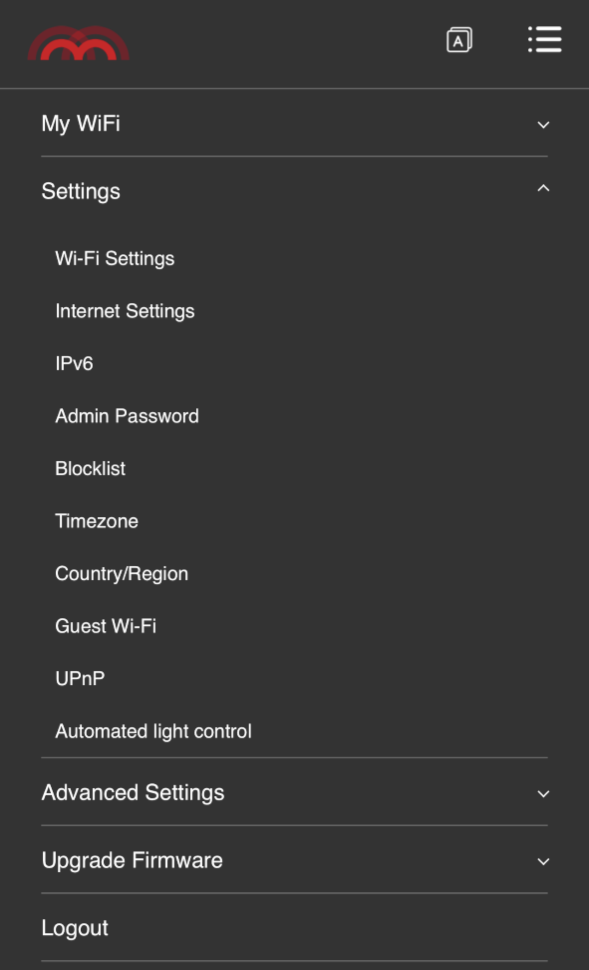
- Enable IPv6
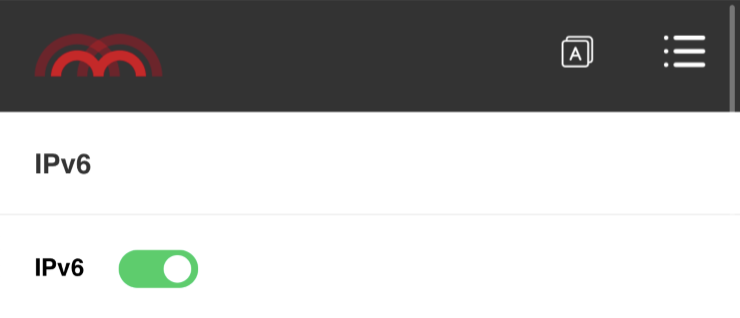
- Scroll down and change the "Internet Settings" from auto to PPPoE, and make sure "Share details with IPV4" is enabled. Then click save.
- Give the router a moment to reboot and authenticate. Once connected, you should notice the light turn green. Give the connection a test as it should be online!